Background:
I don't own too many blasters that aren't made by Nerf, but there are a few that stand out from all the others. One of these is the Air Zone Triple Shot, an interesting spring-powered gun that shoots 3 darts per shot for a shotgun-type dart spread. As it turns out, the Triple Shot's plunger tube is absolutely massive, which is why I decided to pick it up and turn it into something fearsome. In its stock form, the Triple Shot is terrible and the quality of its plastic is shit, but with some simple mods and heavy reinforcements it can rival even the most powerful springers out there. This write-up was based on a couple of write-ups on Nerfhaven, namely
Zorn's Overhaul for all the mods and
makeitgo's post for all the shell reinforcements. I will be removing the auto-rotation, since the plastic rotation piece and track it rides in are too weak and flimsy to handle the weight of my turret and the strength of my plunger to turret seal.
Write-up:
For this write-up, I decided to take a different, potentially more efficient approach in getting both my modding and writing done. For the Stampede and Airtech 3000 write-ups that I just finished, I alternated between modding and writing. This write-up employs a brand spankin' new T da B technique--modding first and asking questions later! Without further ado, let's get down to business. Open up the blaster and behold the simplicity that is the Triple Shot.
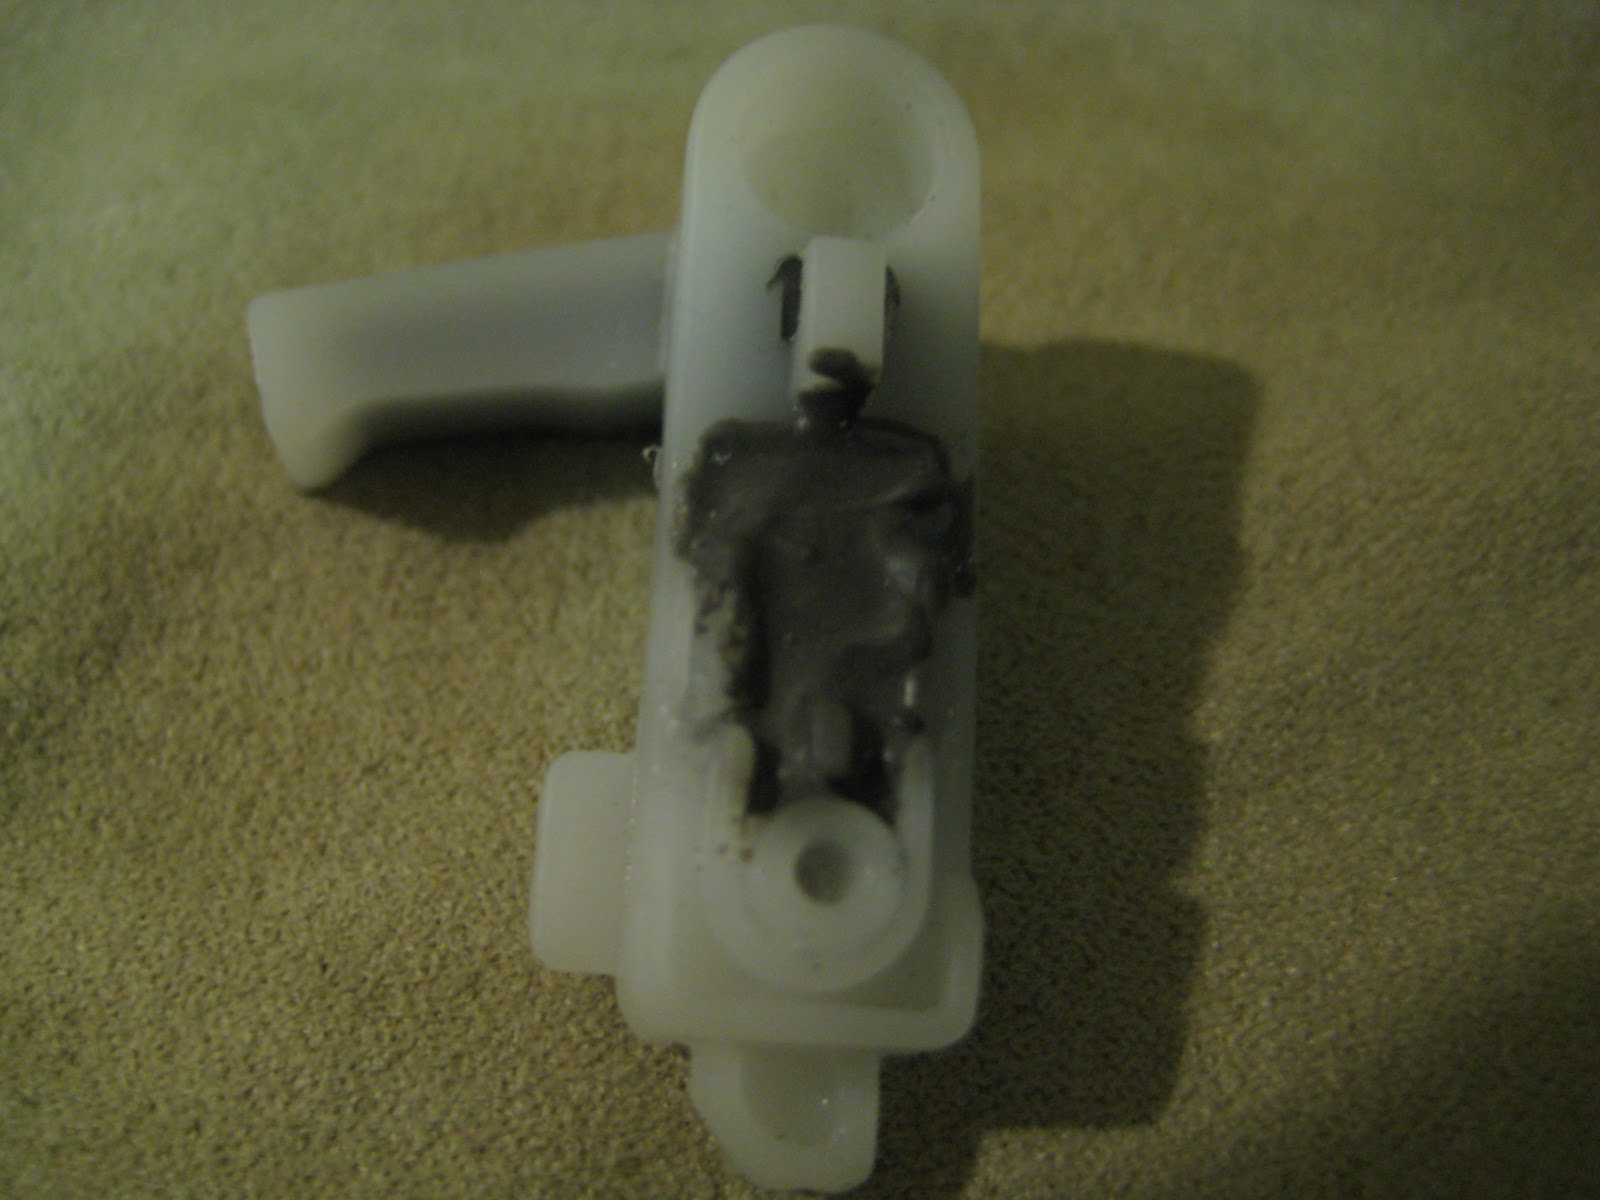
For some odd reason, I decided to start this mod off at the trigger catch. Here's what it looks like in its stock form:
This piece will undergo quite a bit of stress, since it has the torsion spring pressing against one side of it and the force of your mainspring pressing against the top part. I filled in every orifice with JB Weld to insure that nothing would flex. You will also want to glue the catch in the down position after removing the screw and spring from the back. Cut off the "^" as well and you should be left with this:
You trigger catch is now solid as a rock! Now let's Dremel down the plunger tube's orange end cap that the plunger rod goes through. This will allow the plunger rod to travel slightly farther forward to push slightly more air!
Now it's time to Dremel the piece that the priming grip hooks into. This is necessary for the piece to clear the edge of the plunger tube as part of the plunger travel extension mod. You will need to Dremel a right angle at the bend in the piece like so:
As this point you might as well do the turret. Start with the turret base and glue all the rotation components together. Then widen all the holes to fit your desired stefans. After that you need to trim down the ridges on the sides of each hole. I used this Dremel bit:
After you got to town on the turret, it should be able to fit your 3/4'' PETG--test this fit to see.
Now the next part is completely optional and is completely based on personal preference. If you didn't already know, the Triple Shot has a few "clones" out there, like the Hand Cannon, Quad Shot, and Octoshot. They are all the same except for their turrets. I thought that keeping the stock turret cover might allow my blaster to maintain its identity a little better. Dremel out some triangles that fit your PETG.
In case you were wondering, here is the PETG that I'm using for this mod: Mcmaster part #
9245K27. It's 1/2'' ID and 3/4'' OD PETG that is incredibly thick and durable. The reason I went with this fat of barrel material is that it has the best fit in the holes in the turret base. 1/2'' PVC might work but it would really be pushing it. The down side is that I had to ditch the auto-rotation, since the mechanism was way too flimsy to handle the added weight. In any case, I cut down 4 pieces of 12'' PETG to use for my barrels. I think the plunger has enough volume to make it work. I went with my patented T da B method of gluing a turret together. In case you missed it in the AT3K write-up, here it is again.
T da B's turret gluing method:
- Place your barrels into their turret slots and slip on the barrel spacers into the positions you want them.
- Slide each spacer slightly in any direction and mark a dot with sharpie on each barrel an equal distance from each spacer. You should now have dots designating where to glue.
- Slide the spacers back into place over the dots
- Now you will go one barrel at a time, pulling out the barrel, applying glue in a ring around each sharpie dot and near the turret base, then twisting the barrel slowly back into place. Make sure that after the first barrel is glued you check the straightness of the turret and the alignment of the barrel spacers. This is you last chance to get these things aligned, and you'll be really sorry if you fuck this one up. Wait for that first barrel to dry before proceeding. Also remember that if you use quick-setting epoxy, do only one or two barrels per batch.

Now that the turret is done, it's time to Dremel the track that the pump grip slides in. The front of the track needs to be Dremeled to allow for the plunger travel increase, and the back of the track needs to be Dremeled for the draw extension. Also, the priming grip needs to be trimmed on both sides in order to not bump into a raised part of the shell on the outside.
Don't forget about your rear loading slots! There are two layers of plastic that need to be Dremeled in order to allow for darts to be loaded from behind. Initially, I Dremeled the holes barely larger than 1/2'', but it was very difficult to get darts through the second layer of plastic. In the end, I went for ease of use over aesthetics and opened them both up. This is how it should be done!
If you removed the pathetic little stock on the back of the blaster like I did, you'll notice a sharp pain in your right hand when you hold the gun. Dremel off the little nubs on the both halves of the handle to rid yourself of this annoyance.
We're nearly done, fellas--not much longer to go! At this point, it's time for the most important mod of them all--shell reinforcement. I was disappointed in the quality of Lanard's plastic--it's a lot shittier than Nerf's plastic, that's for sure. With spring-powered blasters, reinforcement is almost always a must, especially when boosting up spring power. Start with the grip itself. The poles that attach the grip to the body are are huge point of failure, since they must endure the power of your spring with every prime. I did a two-part reinforcement for the grip. First I took 4 metal staples from a Mcmaster order I got and epoxied 2 of them in each pole (they are hollow). Then I covered the base of each pole in hot glue to hold them in place.
I then reinforced the shell around the plunger tube and around the turret. See the pictures for details.
Whew! At last that part is done. Now all that's left between you and victory is the plunger to turret seal. Cut off the end of the plunger tube and sand it out to the diameter of 1/2'' PVC. I glued on a piece of 1/2'' PVC (slightly less that 1/2'' length) and a ring of Oil-resistant Buna-N rubber for the actual seal, Mcmaster part #
8635K164.
Once the plunger tube is all glued together, lube all moving parts, especially the back of the turret and the rubber on the end of the plunger tube. For my spring setup I used a combo of a purple BBB, black Recon, and old Longshot spring. It comes out to around 10kg of spring power. Here's what the final guts should look like:
Close it all up and you're finally done! What was once a piece of shit is now a dart-slinging beast!
Final thoughts:
For such a cheap and simple blaster, the results are jaw-dropping. I knew the Triple Shot had potential, but I never knew that it could actually compete with brass breeched Longshots and +bows. My triple spring combo is easier to prime than a K26 and hits extremely hard--see picture below.
 |
| Holy shit! |
Yeah, that's not an optical illusion. If you haven't picked up one of these already, I would recommend giving the Triple Shot a try while it is still being sold. I am very pleased with my results and I hope you enjoyed this mod write-up!
Cheers,
~T da B


Very nice! Mine doesn't want to work with me....
ReplyDeleteWhat's the problem?
Delete