It has been a while, and I'm extremely excited to bring you this writeup--it just might be the finest thing I've ever produced! I know you guys have probably grown impatient with the lack of posts as of late, but I wanted this project to really shine. After many hours of toil and many beers, I have finally brought my first homemade to fruition. In fact, I probably spent more money on booze than actual materials for this project. Hey, as Samuel Tayler Coleridge once said, "Some men are like musical glasses--to produce their finest tones you must keep them wet." Never mind the holes that were drilled completely off-kilter in the pump grip and all the random Dremel marks...
In any case, my construction process was mainly based off Ryan's RainbowPump writeup. For those that aren't familiar with it, it looks like this:
Mine is very similar, but here are the major differences:
- 8.5'' K26, rather than a full 11''. Allows for more compression (power)
- Shortened grip and plunger tube by 2''
- String stop replaced by traditional foam rubber padding
- Wooden grip replaced by HDPE (cutting board)
- Plunger head is screwed in with a 2'' screw
- Trigger is 1/4'' thick, rather than 1''
- Wye is not permanently attached
- Rear stock changed
- Clear and white color scheme wherever possible!
Required materials:
Check the link above to Ryan's writeup for the parts list. I'll cover the differences in the writeup.
Writeup:
Begin by printing out all the templates on full-sheet label paper and sticking them onto the 1/4'' polycarbonate and 1'' HDPE. When sticking onto the HDPE, make sure you either leave a lot of label paper out side the lines, or none at all. Since the surface isn't flat, the templates have a hard time sticking.
Now you'll need to draw lines on opposite sides of the plunger tube for the screw and pass-through holes. In order to do this, it would behoove you to make one of these:
All it takes is careful measurement and cutting. A belt sander makes it easy to make corrections as well. Mark a couple of dots on one side of the plunger tube, then draw lines along the sides like so:
Then mark the screw holes:
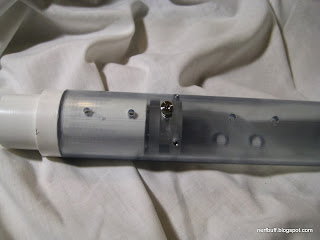
and pass-through holes for the screwdriver:
Drill all the holes out--I actually decided not to thread the holes like in Ryan's writeup, but leave them slightly larger (9/64'') so the handle can be minutely adjusted. Threading them would just make it a bitch to get the screws in later. Cut out all the templates as well with the scroll saw:
At this point you can easily assemble the Rainbow Catch. I didn't thread the holes in the back plate for the Rainbow Catch, but made them larger just like with the plunger tube (9/64''). This allows a little wiggle room for the sliding piece. I also used a shoulder screw for the sliding piece to minimize friction with the plunger tube:
Pop it into place and use a regular 3/4'' screw to secure the sliding piece and whole assembly in the plunger tube. Pop it in the vise and drill out four holes in the Rainbow Catch. I used the PVC hole marker once again:
Time for the handle--I used the belt sander to get things ergonomic, then finished with some finer grit sandpaper to smooth it out. Rather than cut out a 1'' obese trigger, I decided to go with a more conventional 1/4'' trigger made from polycarbonate. I used two 3/8'' 6-32 nylon spacers to keep the trigger centered. Don't forget to drill and tap a hole in the square block:
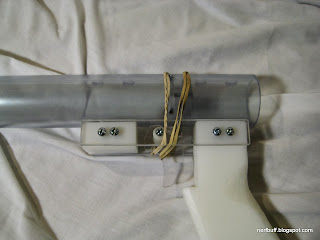
Attach the handle to the plunger tube with a single screw in that singleton hole and lash them together with rubber bands:
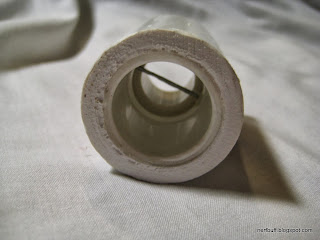
It didn't work that well, but the holes eventually got drilled--another reason to drill the plunger tube screw holes larger to account for error. Now prepare the internal coupler like in Ryan's writeup and hammer it into place:
Drill out the holes on both sides:
Now for one of the shitty parts--the pump grip. First, mark off your lines with a Sharpie (I made another measuring square for this piece). The width of the channel should be 1 1/2'':
People say to tape your lines, but it really didn't do much for me aside from require extra cleanup. I used my Dremel with a diamond cutting wheel, which is pretty thin, and it worked just fine. After a lot of cutting and a lot of sanding and a lot of poisonous fumes, I was left with this:
Do the same for the slotted piece of PVC:
Use that little line on top of the slotted piece to drill and tap the hole that secures it to the internal coupler. Now onto the plunger rod! I actually ended up modding my skirt:
Here's the plunger head:
Now for the plunger rod--it should be 1' 2'':
Slap on the plunger head, as well as 8 1/2'' of a K26 spring. Also prepare the 2'' steel rod and grind down the sharp edges:
Not much left now aside from the shoulder stock and front coupler:
It is essential that you hammer a small piece of PVC into the back of the coupler--this allows the 3/8'' set screws securing the front bushing to never penetrate the plunger tube. Here is the finished front bushing:
I got a little fancy with the rear stock and added a 1 1/2'' PVC end cap and a polycarbonate "window:"
Drill a hole through the 2'' PVC sheath, 1 1/2'' PVC tee, and 1 1/4'' slotted PVC and tap it. Now for the final order of operations:
- Slip on the pump grip
- Attach the handle
- Insert the plunger rod
- Insert the steel priming bar
- Attach the shoulder stock and sheath
- Prime the blaster
- Lube the tube
- Add plunger padding
- Hammer in the bushing
- Add a couple of set screws to either side of the bushing
Check out dat compression:
And of course it needs a matching hopper and darts:
Final words:
The power is ridiculous. It is comfortable and a little bit shorter than the original creation. I have complete faith that the blaster will last for a long time, and I love the clear and white color scheme as well. All in all, I'm very satisfied with this first foray into the realm of homemades!
My plunger head is sub-optimal, but my seal is still pretty good. If I were to make another RainbowPump, here are some things I would do differently:
- Single piece body, like in qwertyman's mod
- Solvent weld the handle to the body
- Drill holes in the pump to access the catch screws rather than the handle screws
- Solvent weld the front bushing
I hope you guys enjoyed this cherry-popping experience,
~T


Will you be posting this for the NerfHaven contest?
ReplyDeleteNope! I have something original planned for that--something completely impractical but entertaining :)
DeleteDamn, great blaster, great write-up!
ReplyDeleteNice man :)
ReplyDeleteThanks dudes! It feels good to finally become a part of the homemade club :D
ReplyDeleteYay! No contest post on this thing! haha. You might want to consider making some sort of vent hole. My rainbow has open slots so air can get through there and ryan has an open tee in the back. You have effectively covered both of those areas. I'm sure it doesnt affect performance much but you might want to look at it. Try taking off the stock and see what fps it gets then and then you can make your choice on what you want to do. :)
ReplyDeletePlease mention the catch sizes and Handle size.
ReplyDeleteI'm two years late but the catch is just any spring that can fit over the screw but not big enough to leave the screw unless you are planning on using small nylon washers. The handle size you can find in the templates in other write-ups or 3d stl files that you can 3dprint. Good luck!
Deletewhat did you use for the rubber o ring
ReplyDelete